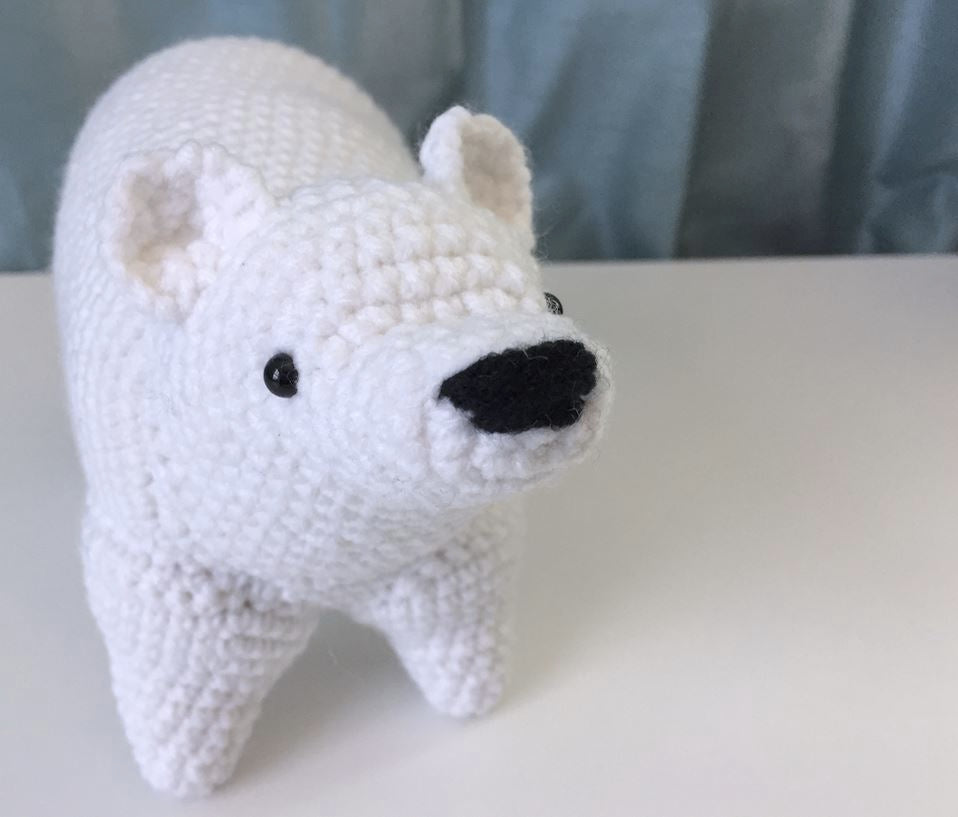
Welcome back to the Polar Bear Amigurumi CAL! It's now socially acceptable to be in full holiday mode, so grab a hot drink, put on some wintery tunes, and let's finish up our bears!

Abbreviations:
ch = chain
slp st = slip stitch
sc = single crochet
sc dec = single crochet decrease
rep = repeat
2x, 3x, etc = 2 times, 3 times, etc
exsc = extended single crochet*
BLO = back loops only
FO = finish off
Special stitches:
* Extended single crochet (exsc)
Insert hook into next stitch, yarn over (YO) and pull up a loop, YO and pull through ONE loop, YO and pull through two loops. Essentially, it's a chain inside of a sc to make it taller. I like to use the exsc instead of the dc because it's a more compact stitch and doesn't leave gaps for the stuffing to show through.
The legs and tail of the bear are each worked in continuous rounds. To make sure you don't lose your place, mark the beginning of each new round with a stitch marker. Do not chain 1 at the beginning of rounds or join rounds with a slip stitch, as this will leave a visible "scar" in your stitches.
Assembly info follows under each component's pattern.
Legs
Left side, front and back
ch 2 or magic loop
-
8 sc in 2nd ch from hook (8)
-
sc in each sc around (8)
-
*2 sc in 1st sc, sc in next sc* rep *-* around (12)
-
sc in each sc around (12)
-
*2 sc in 1st sc, sc in next 2 sc* rep *-* around (16)
-
sc in 1st 10 sc, exsc in last 6 sc (16)
-
exsc in 1st 2 sc, sc in next 8 sc, exsc in next st, 2 exsc in next st, exsc in next 2 sts, 2 exsc in next st, exsc in last st (18)
-
exsc in 1st 2 sts, *2 sc in next sc, sc in next 3 sc* rep *-* 4x (22)
-
*2 sc in 1st sc, sc in next 4 sc* rep *-* 3x, 2 sc in next sc, sc in next 3 sc, 2 sc in next sc, sc in last 2 sc (27)
-
*2 sc in 1st sc, sc in next 5 sc* rep *-* 4x, sc in last 3 sc (31)
-
sc in 1st 12 sc, slp st in next sc, TURN (12)
-
skip slp st, sc in next 15 sc, slp st in next sc, TURN (15)
-
skip slp st, sc in next 13 sc (13)
FO, leaving a long tail for assembly.
STUFF the legs and set aside. We'll finish all of the legs before starting to pin them in place and affix them to the body.
Right side, front and back
ch 2 or magic loop
-
8 sc in 2nd ch from hook (8)
-
sc in each sc around (8)
-
*2 sc in 1st sc, sc in next sc* rep *-* around (12)
-
sc in each sc around (12)
-
*2 sc in 1st sc, sc in next 2 sc* rep *-* around (16)
-
sc in 1st 10 sc, exsc in last 6 sc (16)
-
exsc in 1st 2 sc, sc in next 8 sc, exsc in next st, 2 exsc in next st, exsc in next 2 sts, 2 exsc in next st, exsc in last st (18)
-
exsc in 1st 2 sts, *2 sc in next sc, sc in next 3 sc* rep *-* 4x (22)
-
*2 sc in 1st sc, sc in next 4 sc* rep *-* 3x, 2 sc in next sc, sc in next 3 sc, 2 sc in next sc, sc in last 2 sc (27)
-
*2 sc in 1st sc, sc in next 5 sc* rep *-* 4x, sc in last 3 sc (31)
-
sc in 1st 25 sc, slp st in next sc, TURN (25)
-
skip slp st, sc in next 15 sc, slp st in next sc, TURN (15)
-
skip slp st, sc in next 13 sc (13)
FO, leaving a long tail for assembly.
STUFF the legs.
Pin all of the legs to the body and adjust until it can stand without wobbling. The turned rows at the end of the legs patterns should be facing the OUTSIDE of the body on both sides. The turned rows help fit the legs to the contour of the body.

Once the bear is balanced, sew the legs in place. Before finishing each attachment, add a little more stuffing to make sure the legs are firm.

Weave in the ends.
ch 2 or magic loop
-
5 sc in 2nd ch from hook (5)
-
*2 sc in 1st sc, sc in next sc* rep *-* 2x, 2 sc in last sc (8)
-
*2 sc in 1st sc, sc in next sc* rep *-* 3x, sc in last sc (11)
-
sc in each sc around (11)
-
sc dec, sc in next 3 sc, sc dec, sc in last 4 sc (9)
FO leaving a long tail for assembly.
Press the tail flat and sew to the butt of the bear, at about round 33 of the body. Make sure it’s centered in relation to the head on the body.

Weave in all remaining ends.
That's it for this month's amigurumi CAL, and that's it from me this year! Thanks everyone for crocheting along with me, I hope you enjoyed working on my designs as much as I loved sharing them and seeing all your wonderful amigurumis!
If you have any questions, comments or corrections regarding this pattern please feel free to contact me (littleravenfiberarts@gmail.com), I’m here to help.
Make sure to pop into the Fun With Furls Facebook Group to share your photos and admire everyone else’s crochet handiwork too!
Happy Crocheting, and Happy Holidays!


